Your Complete Undercut Maintenance Guide for 2026
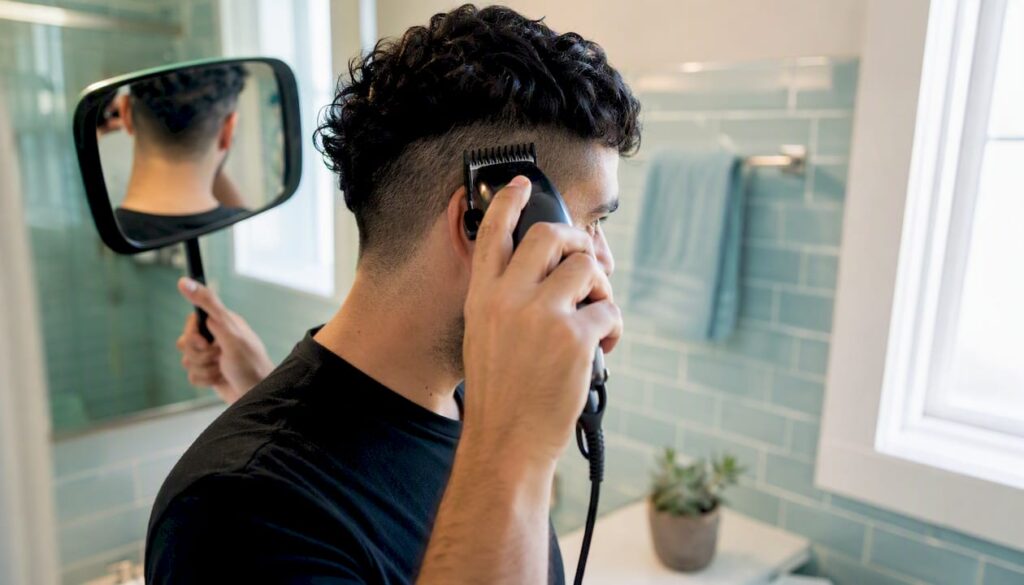
To keep an undercut sharp, refresh the shaved sides every 2–4 weeks and the longer top every 4–8 weeks. The single most important step you can take right now: clean up the hairline, brush away any visible stubble growth, and apply a small amount of product to reset the shape. Those three actions alone can buy you another week of clean style.
Quick actions for today:
- Do check your neckline and temples in a two-mirror setup. Visible fuzz there is the first thing people notice.
- Do apply a pea-sized amount of clay or pomade to the top section and reshape with your fingers.
- Don’t overclip the guideline. That single mistake is what turns a touch-up into a full reshape.
Key Takeaways
Consistent undercut upkeep comes down to one rule: maintain the sides on a fixed schedule and never skip the daily styling habit that keeps the top looking intentional.
| Point | Details |
|---|---|
| Maintenance cadence | Refresh sides every 2–3 weeks for standard undercuts; skin fades need attention every 1–2 weeks. |
| Must-have tools | Corded clippers with a full guard set, a zero-gap trimmer, and a two-mirror setup cover most home touch-ups. |
| Daily styling habit | Towel-dry to 70–80%, apply a pea-sized amount of clay or pomade, and rough-dry before shaping. |
| When to book a barber | Drifted guidelines, skin irritation, or any desired style change are all reasons to skip the DIY and sit in the chair. |
| Phillythebarber | Offers undercut touch-ups, skin fades, dry-cut finishing, and retail grooming products at the Copenhagen shop. |
Table of Contents
- How often does your undercut actually need maintenance?
- What tools and products do you actually need?
- How to trim your undercut at home, step by step
- How to style and care for the top section between cuts
- Adjusting your routine for your hair type and undercut style
- When should you book a barber instead of doing it yourself?
- Master-barber tips from Philly’s Barber Shop for longer-lasting undercuts
- Why consistent maintenance is the real secret to a great undercut
- Philly’s Barber Shop: professional undercut upkeep in Copenhagen
- Sources
How often does your undercut actually need maintenance?
Maintaining the sides of a standard undercut every 2–3 weeks keeps the contrast crisp. The top can usually wait 4–8 weeks depending on how much length you carry. Hair grows roughly half an inch per month on average, and on a high-contrast cut like an undercut, that regrowth shows fast on the shaved or faded sides before it becomes obvious on top.
Skin fades need the most attention because the contrast between shaved skin and growing hair is visible within days, not weeks. A standard undercut with a longer taper is more forgiving. If you style the top well, you can often stretch the top trim by a week or two without anyone noticing.
Barber-recommended maintenance routines emphasize a combination of daily styling habits, scheduled trims, and weekly clarifying washes to keep an undercut looking salon-fresh.
The edge-up and neckline are the first things to go. When those start to blur, the whole cut looks grown out even if the fade itself is still relatively clean. A small styling adjustment, like slicking the top back or pushing it forward, can visually extend the life of the cut by a few days. But there’s a point where no amount of product covers a fuzzy neckline.
What tools and products do you actually need?
The right setup at home saves you money and prevents the kind of mistakes that require a barber to fix. Here’s what each tool does and what to look for.
| Tool | Role | What to Look For |
|---|---|---|
| Clippers | Main cutting tool for sides and back | Corded for consistent power; detachable blades for easy cleaning |
| Trimmers/edgers | Neckline, around ears, detail work | Zero-gap adjustable blade; cordless for maneuverability |
| Guard set | Controls cut length | Full set from #1 to #8; plastic guards that click securely |
| Barber scissors | Top section trimming, point-cutting | 6 inch, Japanese steel preferred |
| Wide-tooth comb | Detangling, sectioning | Seamless teeth to avoid snagging |
| Handheld mirror | Back-of-head visibility | Large enough to see the full neckline |
For styling products, the role matters more than the brand name. Clay gives matte hold and works well for textured or natural-finish styles. Pomade adds shine and is better for slicked-back or polished looks. Sea-salt spray adds texture and volume to the top section before you blow-dry. A clarifying shampoo used once a week removes product buildup so your guideline stays visible and your cut stays accurate. Leave-in conditioner on the longer top section prevents dryness and breakage, especially if you use heat regularly.
Corded clippers tend to outperform cordless for home use because the motor stays consistent throughout a session. For a beginner, a clipper with a lever-adjustable blade and a full guard set covers most situations without needing multiple machines. You can find solid options at Phillythebarber’s barber products page.
Pro Tip: Clean your clipper blades after every single use. Brush out hair, apply two drops of clipper oil along the blade teeth, run the machine for five seconds, then wipe the excess. Dull or dirty blades pull hair instead of cutting it cleanly, and that pulling causes irritation on shaved skin. Replace or professionally sharpen blades when you notice any dragging.
How to trim your undercut at home, step by step
This sequence works for a standard touch-up, not a full restyle. If you’re changing the fade height or adding a new disconnect, see a barber.
Prep checklist before you start:
- Wash with a clarifying shampoo and towel-dry to about 70–80% dry. Wet hair clings and can make lines look lower than they are.
- Detangle thoroughly with a wide-tooth comb.
- Set up two mirrors so you can see the back of your head clearly. Natural light or a bright overhead light is better than a dim bathroom.
- Lay out your guards in order so you’re not hunting for them mid-cut.
Step-by-step trim:
- Confirm your guard. Use the same guard number you used at your last trim. Using the same guard as your previous cut is the single most reliable way to avoid accidentally raising the guideline.
- Set the guideline. Hold the clipper flat against the side of the head and make one clean pass along the existing line. Don’t push higher yet.
- Clip the sides and back. Work in short upward passes from the neckline toward the guideline. Start with conservative, small-coverage passes and check frequently. You can always take more off; you can’t put it back.
- Detail around the ears. Switch to a trimmer for the area around the ear. Follow the natural curve, keeping the trimmer flat against the skin.
- Check symmetry. Step back from the mirror and compare both sides. Tilt your head slightly to see if the lines match.
- Finish the neckline. Use the trimmer to define the neckline. A natural arc (following the hairline’s curve) looks cleaner than a straight line for most head shapes.
- Apply product and assess. Style the top section as you normally would, then check the overall shape. The cut should look intentional, not like a DIY project.
Common mistakes to avoid:
- Cutting wet hair for fades. Wet hair compresses, so the cut sits higher than expected once dry.
- Raising the guideline even slightly. Once it’s up, it’s up, and bringing it back down means cutting the top shorter too.
- Over-clipping the top section with clippers. The top is for scissors and point-cutting, not bulk clipper work.
If you mess up a line: Don’t try to fix it by going shorter on the other side. Instead, blend the mistake with a guard one size up, apply product to minimize the visual contrast, and book a barber appointment. Most small errors are fixable in the chair; most attempts to self-correct at home make them worse.
How to style and care for the top section between cuts
The long section of an undercut is where daily habits make the biggest difference. A good morning routine takes under five minutes and keeps the cut looking intentional all day.
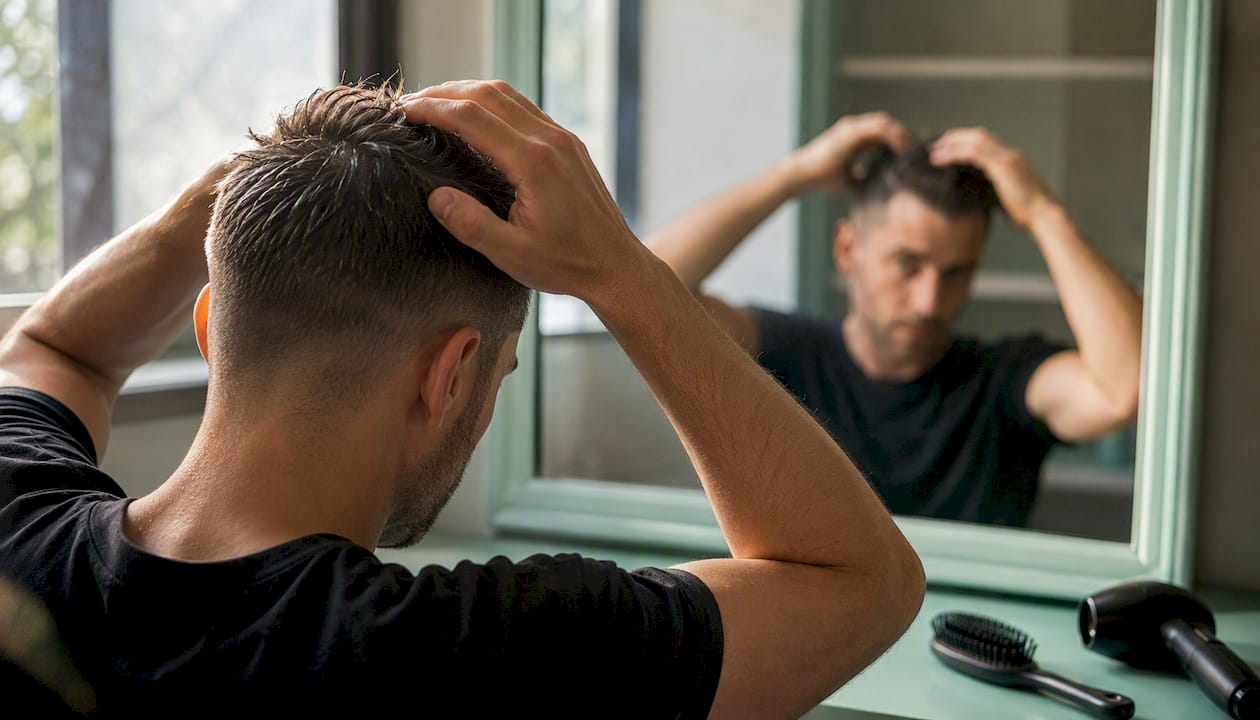
For clay or pomade, start with an amount the size of a pea, warm it between your palms, and work it through from roots to ends. Rough-dry with a blow-dryer on medium heat while shaping with your fingers. This builds volume and sets the direction of the hair. Finish with a light-hold spray if you need the shape to stay put through a long day.
Product choice depends on the finish you want. Clay gives a natural, matte look and works well for textured styles. Pomade is better for sleek, defined shapes. Cream is a good middle ground for wavy or curly tops that need moisture alongside hold. Salt spray used before blow-drying adds body and separation without weighing the hair down.
For bad-hair mornings, dampen the top section with water from a spray bottle, work a small amount of product through, and reshape with your fingers. Most flatness and overnight compression resets with moisture and a little heat. Midday collapse, where the style falls flat by afternoon, usually means you used too much product in the morning or skipped the blow-dry step.
Scalp care under the shaved area matters more than most people realize. Freshly shaved or closely clipped skin is exposed skin. Moisturize the sides and back with a light, non-comedogenic lotion after every wash. If you’re outside in summer, apply SPF to the shaved areas. Watch for redness, bumps, or ingrown hairs, especially in the first 48 hours after a fresh fade. A weekly clarifying wash keeps the scalp clean and reduces the chance of follicle irritation from product buildup.
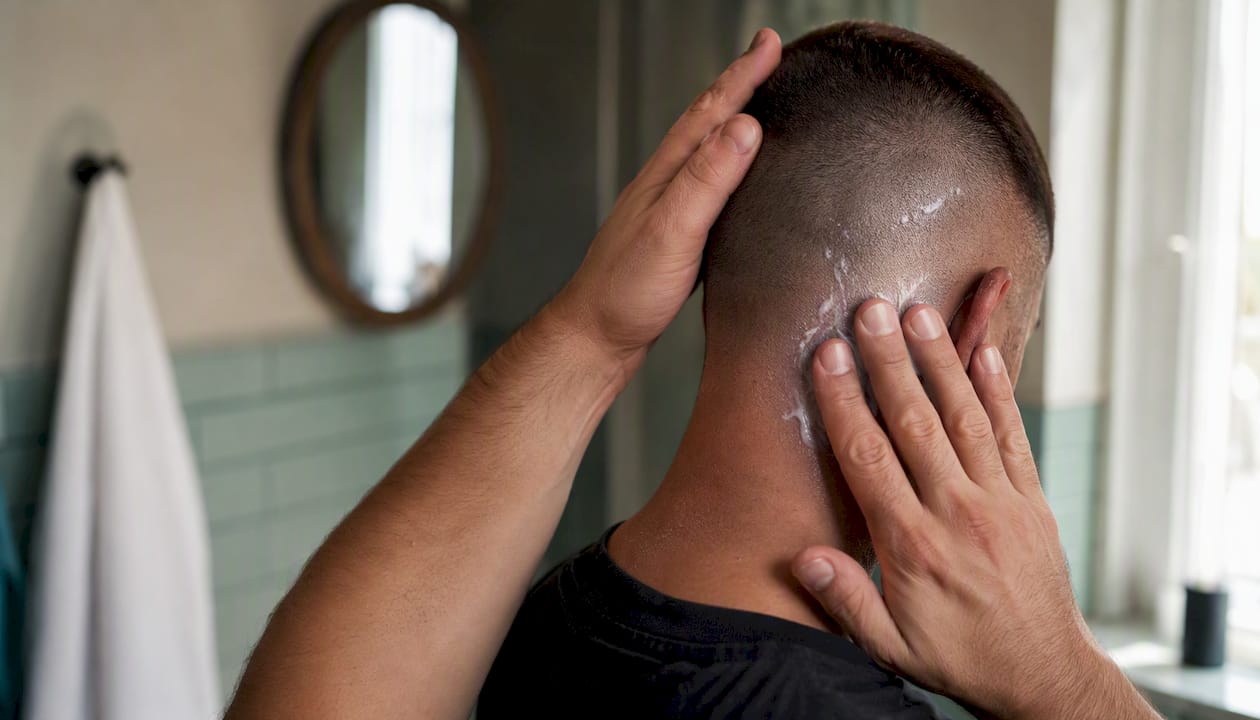
Pro Tip: Condition the mid-lengths and ends of the top section only. Applying conditioner to the roots weighs them down and kills the volume that makes an undercut’s long top look intentional.
Adjusting your routine for your hair type and undercut style
Not every undercut behaves the same way, and maintenance that works for straight, medium-density hair needs real adjustment for curly, fine, or thick textures.
Curly and wavy hair:
- Curls shrink when dry, so the top section looks shorter than it actually is. Account for this when deciding whether to trim.
- Use a cream or curl-defining product rather than a stiff clay. Heavy hold products flatten curl pattern and make the top look dense rather than textured.
- Trim frequency for the sides stays the same, but the top may need trimming less often because shrinkage masks length gain.
Fine and thin hair:
- Fine hair shows the guideline and any unevenness more clearly than thick hair. Precision matters more.
- Use lightweight clays or texturizing sprays rather than heavy pomades, which flatten fine hair against the scalp.
- Blow-dry with a round brush or use a volumizing mousse before rough-drying to add body.
Thick and dense hair:
- Thick hair grows faster in visible bulk, so the sides may need touching up closer to the 2-week mark rather than 3.
- Point-cut the top section to remove weight rather than blunt-cutting, which creates a boxy shape.
- Sectioning the top before trimming prevents the scissors from taking too much at once.
Skin fade vs. standard undercut: Skin fades need refreshing every 1–2 weeks because even a few days of growth blurs the skin-level finish. A standard undercut with a longer taper is far more forgiving. If you want lower maintenance, a longer taper or a scissor-cut undercut is the smarter choice. For guidance on how often to schedule salon visits based on your specific style, a professional consultation can help you set a realistic calendar.
Seasonal adjustments: In summer, the scalp sweats more, which means product builds up faster. Clarify twice a week instead of once. In winter, cold and dry air strips moisture from both the scalp and the longer top section. Add a leave-in conditioner to your routine and reduce heat styling frequency to prevent breakage.
When should you book a barber instead of doing it yourself?
DIY touch-ups work well for maintaining an existing line. They don’t work well for changing it, fixing a mistake, or managing a style that’s grown significantly past its shape.
Book a barber when you notice any of these:
- The guideline has drifted and you’re not sure where it originally sat.
- You have visible skin irritation, razor bumps, or ingrown hairs along the fade line.
- You want to change the fade height, add a hard part, or reshape the disconnect.
- The cut has grown out for more than 6 weeks and needs a full reset, not just a touch-up.
- You’ve attempted a home fix and made it worse.
What to say at your appointment:
When you sit down, tell your barber the guard number you’ve been using at home, the height where the guideline currently sits (temple, mid-ear, or below the ear), and whether you want the fade to go to skin or leave a little length. Bring a photo of the cut when it looked its best. Ask for a dry-cut finish so the barber cuts and styles the top the way you actually wear it, not the way it sits when wet. For more help putting this into words, the guide on how to describe a haircut to your barber covers the exact phrasing to use.
On scheduling and cost: Most barbers recommend booking recurring appointments every 3–4 weeks for a standard undercut. Skin fades may need a standing appointment every 1–2 weeks. Scheduling three appointments in advance keeps you from scrambling when the cut starts to look rough. Advanced reshaping, like changing a fade height or adding a new disconnect, typically takes longer and costs more than a standard touch-up, so factor that in when you’re deciding how long to stretch between visits.
Master-barber tips from Philly’s Barber Shop for longer-lasting undercuts
After more than 20 years behind the chair, a few habits separate clients whose undercuts look great at week three from those who look grown out by week one.
Set the hair in the direction of its natural growth pattern before you apply any product. Fighting the natural direction creates frizz and makes the top section look unruly by midday. Rough-dry for volume first, then use a light finishing spray to lock the shape without adding buildup. That two-step finish, rough-dry then light spray, is what gives the top section its structure without the stiffness that heavy pomade creates.
Book three appointments in advance. Clients who do this maintain their cut consistently because they’re never waiting two weeks for an opening after the cut already looks rough. Ask for dry finishing at every appointment. A barber who cuts and styles your hair dry is cutting it the way you actually wear it, not the way it sits when wet and combed flat.
Pro Tip: Always use the same guard number as your last trim as your starting point. Going one guard size lower than you think you need is the most common way to accidentally raise the guideline and end up with a higher undercut than you wanted. When in doubt, go larger and take less off.
Why consistent maintenance is the real secret to a great undercut
From where I stand, the clients who get the most out of their undercut are the ones who treat maintenance as a system, not a reaction. They don’t wait until the cut looks bad to do something about it. They style it every morning, clarify once a week, and have a standing barber appointment on the calendar before the current one is even finished.
The undercut is one of the most versatile cuts out there, but it’s also one of the most honest. It shows neglect faster than almost any other style. If you want low maintenance, a longer taper or a scissor-cut variant is a smarter fit for your lifestyle. If you want the sharp, high-contrast look, you need to commit to the upkeep.
At Phillythebarber, Philly has spent over two decades helping clients find the version of this cut that fits their hair type, their schedule, and their style. That experience shows up in every appointment, from the first consultation to the dry-cut finish.
Philly’s Barber Shop: professional undercut upkeep in Copenhagen
If you’d rather leave the precision work to a pro, Phillythebarber offers undercut touch-ups, skin fades, dry-cut finishing, and full grooming consultations at the shop in Copenhagen. Every appointment includes a personalized assessment of your hair type and growth pattern, so the cut is shaped to how you actually wear it.
Philly also carries a curated selection of retail tools and aftercare products, including professional clippers, pomades, clays, and beard care, so you leave with exactly what you need to maintain the cut at home between visits. If you’re bundling services, the beard trim process pairs naturally with an undercut touch-up for a complete grooming session. For readers in the Vesterbro area, the Copenhagen grooming guide covers local booking options and what to expect. Book your next appointment directly at Phillythebarber and come in knowing exactly what you want.
Sources
- How to Maintain Undercut Hairstyles for Men in 2026
- Ultimate Undercut Checklist: Style, Maintain, Conquer
- How To Do Undercut Hairstyle: Full Guide & Technique – ChicSnips
- How to Do an Undercut Haircut for Men (Step-by-Step)
- Easy Ways to Trim an Undercut at Home